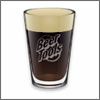
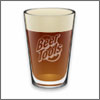
I brewed this sessionable beer with the hope that it would be ready for Christmas Day and it was. It proved to be a perfect beer for what proved to be a long day. Very drinkable and smooth and without the big strength that most of my beer's come with.
The taste was nice, very malty with the dark malts very much to the fore, however I was a little bit disappointed with the contribution of the American C hops at the end, there was not much present. This is now the third stout that I have brewed and I have to say that although number two and three have been good, none of them have compared with number one, the original Standard Stout. With that in mind I think the next time I brew a stout I will try and replicate that original recipe and if I can, I will make that my annual stout recipe.
Friday, December 30, 2011
Wednesday, November 30, 2011
AG #10 - Standard Stout II - Brew day
 |
| Lots of Chocolate Malt & Roasted Barley in the grain bill. |
Brew day took a little while to get going as I started to work out how to brew in my new surroundings. Eventually decided to take over the shed for the day and set everything up in there. This worked out quite well and I ran a water hose and extension cable from the outside water and electricity points at the back of the house. I was a little worried that the single outside electricity point would not be able to handle a 60 minute boil with two x 2 kw elements on the go, however all went well and resetting of trip switches was not required.
I have not yet become fully accustomed to my new surroundings and so there was a little reorganization of brewing vessels as the day went on, however I have learned from this and will have a proper three tier set up for my next brew.
 |
| Wort aeration system in action. |
 |
| The 'Brew-Shed' |
Saturday, November 19, 2011
Finally, a brew day comes around.
It has been nearly six months since my last brew day. Moving house, starting a masters course and being hectic in work has seriously curbed my brewing exploits. Come hell or high-water tomorrow I will be brewing the following stout recipe which should be ready just in time for the festive holidays.
With this beer I am aiming for a smooth, creamy stout with a little twist of American hops at the end which I hope will balance out the dark malts and the bitterness of the Goldings hops.
Author: Mark
Date: 20/11/2011
With this beer I am aiming for a smooth, creamy stout with a little twist of American hops at the end which I hope will balance out the dark malts and the bitterness of the Goldings hops.
Standard Stout II
13-B Sweet StoutAuthor: Mark
Date: 20/11/2011
Size: 22.0 L
Efficiency: 75.0%
Attenuation: 72.1%
Efficiency: 75.0%
Attenuation: 72.1%
Original Gravity: 1.044 (1.044 - 1.060)
Terminal Gravity: 1.012 (1.012 - 1.024)
Color: 63.85 (59.1 - 78.8)
Alcohol: 4.19% (4.0% - 6.0%)
Bitterness: 22.5 (20.0 - 40.0)
Ingredients:3000 g Maris Otter
475 g Barley Flaked
475 g Carapils®/Carafoam®
400 g Roasted Barley
245 g Chocolate 1060 EBC
36 g Goldings (5.0%) - added during boil, boiled 60 m
5 g Ahtanum (6.0%) - added during boil, boiled 1.0 m
5 g Amarillo (8.5%) - added during boil, boiled 1.0 m
5 g Columbus (15.0%) - added during boil, boiled 1.0 m
5 g Simcoe (13.0%) - added during boil, boiled 1.0 m
1.0 tsp Irish Moss - added during boil, boiled 15 m
1 ea Fermentis US-05 Safale US-05
Wednesday, November 2, 2011
It makes you proud to be Irish....
I promise I will get back to blogging about brewing soon, work and family just keep getting in the way at the moment :-)
In the meantime here is a good news story:

In the meantime here is a good news story:
Irish Bartender wins
International Master Bartender Competition 2011
Dubliner, Fearghus McCormack, a third generation barman in the family run Merrion Inn, Dublin, has beaten stiff competition from across the globe to carry off the title of Pilsner Urquell International Master Bartender 2011. During a highly-competitive week-long final in the Czech Republic this month, he claimed the victory against an impressive group of finalists representing 15 countries.
Fearghus claimed the title in Prague earlier this month in a gala final he likened to ‘the Oscars of beer’. Commenting on his win Fearhgus said: “I can’t begin to express how excited and proud I am to win this title. The Merrion Inn always prides itself on quality, from the staff in the bar, to the food we serve, to the beers we stock. To have been internationally recognised & awarded by a brand of the pedigree of Pilsner Urquell is amazing. Pilsner Urquell is a real beer lovers’ favourite in The Merrion Inn..."

Thursday, September 22, 2011
Boston Beer...ahhhhhh
Just back from a trip to Boston and you got to love American bars. The choice of beer is truly staggering, you can choose your craft beer type bar and have a selection of 10-20 draft beers, some specials and then an endless bottle beer selection. Even if you are unfortunate to be dragged to a bar with no beer selection, they will probably still have Harpoon IPA on draft and a few Sam Adams selections.
Here is just some of the beers I got to try, all on draft unless it says otherwise:
Harpoon IPA : Whales Tale Pale Ale (bottle) : Clown Shoes Black IPA : Goose Island Honkers Ale : Boulder Mojo IPA : Stone Ruination IPA (Bottle) : Sierra Nevada Tumbler : Sam Adams Boston Lager : Pretty Things Jack D'Or Saison : Green Flash West Coast IPA : Gritty's Blackfly Stout
I also managed to stumble across a Sam Adams tasting session in my hotel bar and got to try bottles of their Oktoberfest, IPA and Irish Red.
The highlight of the trip from a bar point of view was finding Bukowski Tavern, it is on Dalton Street near the Boylston Street junction. From the outside it looks like a tiny dive bar, inside doesn't alter this perception much, however the staff are great, the music is good, and they have a selection of about 100 beers. Included in this are about 20 on draft and a cask offering specials. If you are in Boston make sure you check it out. Honorable mention also goes to The Other Side, it can be found just over the bridge at the junction between Newbury and Mass Avenue.
Here is just some of the beers I got to try, all on draft unless it says otherwise:
 |
| Beer menu from The Other Side, sorry for the poor quality pic. |
I also managed to stumble across a Sam Adams tasting session in my hotel bar and got to try bottles of their Oktoberfest, IPA and Irish Red.
The highlight of the trip from a bar point of view was finding Bukowski Tavern, it is on Dalton Street near the Boylston Street junction. From the outside it looks like a tiny dive bar, inside doesn't alter this perception much, however the staff are great, the music is good, and they have a selection of about 100 beers. Included in this are about 20 on draft and a cask offering specials. If you are in Boston make sure you check it out. Honorable mention also goes to The Other Side, it can be found just over the bridge at the junction between Newbury and Mass Avenue.
Monday, September 12, 2011
Pelle, comes to town
 |
| Humulus Lupus and some members of Beoir. |
Over the course of four hours we managed to update them all on the current state of Irish Craft beer and quite a few Irish beers were sampled, including Metalman Pale Ale, Galway Hooker, O'Hara's IPA, Trouble Or, Howling Gale and also Black Rock Stout which was on Cask. Metalman Pale Ale seemed to be the stand out beer.

 Pelle also managed to bring me over a few bottles of beer that I am looking forward to sampling. They both come from his local brewer, Eskilstuna Olkultur AB, and the brewer Lars Ekstron was there in person so that I could pick his brains. The beers are great as they are something that I would never be able to get in Ireland, one is a Double IPA and the other an Imperial Stout.
Well in a few days time I am off to Boston for a wedding and I hope to be sampling some great beers, I might also fit in a brewery tour or two if time allows.
I also also determined to get back brewing once I return from my trip. The brew day for Furious IPA seems only a distant memory (early June) and so I am keen to get back into it.
Tuesday, August 23, 2011
Lager Yeast, from Argentina!
Interesting article on the BBC News website today.
Scientists have identified a yeast that led to the discovery of lager. The researchers isolated the new species in the frozen forests of Patagonia in South America.
Saturday, August 20, 2011
Delays, delays.....but something to look forward to
It has been nearly a month since I posted my recipe for Standard Stout II, my lack of an update is not down to posting lethargy, but rather the fact that I have not brewed it. Why I hear you cry, well because in the last month we have decided to move house to a new town, said house has been found and we are moving next week.
The Brewing implications of the new house are significant!
Three things brewers look for in a house:
The Brewing implications of the new house are significant!
Three things brewers look for in a house:
- An outside building
- Outside access to electricity
- Outside access to water
Check, check and check. The new house has a decent size shed at the back of the garden and also has an outside tap and electrical socket. More than this my new town (Bray, County Wicklow, about 12 miles south of Dublin) has one of the original brew pubs in Ireland, The Porterhouse. It also has one of the best off-licenses for craft beer in Ireland, Holland's. The next couple of weeks are going to be a bit hectic, however I will report back soon on how the shed/brewery set up is going :-)
Monday, August 1, 2011
AG #9 - Furious IPA - First Pour
I have been very patient with my Furious IPA beer that I brewed at the beginning of June. Based on Surly Brewing's Furious (pic below). Two weeks fermenting and a further 4 weeks conditioning in the keg and the results of that patience have been very pleasing.
Pours a murky redish-brown colour with a creamy thick head.
 |
Pours a murky redish-brown colour with a creamy thick head.
Hints of yeast off the nose initially and an ever so slight metallic taste can be gotten with the first taste, however as the beer warms up its true character emerges, a sweet malty base is nicely counterpointed by a strong hop aroma and flavour. The malty characteristics are a real success, Belgian Aromatic, Crystal and Roasted Barley blend together really well. The body is perfectly medium bodied, carbonation nice and low, very smooth mouthfeel.
The hop characteristics are strong but wonderfully smooth, no doubt this is down to the first wort hopping, a technique I will certainly be using again in my IPA's and APA's.
Defining characteristic is just how well all of the traits of this beer come together, sweet malty base, smooth hop bittering, nice high level of late hop flavour and aroma all brought together in a wonderfully smooth mouthfeel. Really happy with the way this turned out and will definitely be brewing this again.
Furious IPA:
Recipe
Brew Day
Fermentation & Conditioning
Furious IPA:
Recipe
Brew Day
Fermentation & Conditioning
Saturday, July 23, 2011
AG #10 - Standard Stout II - Recipe
I have been contemplating my next brew for a few weeks now and I have decided to brew a beer that I made last year, but this year I am adding a little twist. Standard Stout was brewed last June and I was really happy with the results, beaming at the time that it was my best beer to date. For this years version I have decided to keep the grain bill the same, the bittering hop addition the same, the yeast has been changed based on my current inventory, however the significant change is that I have decided to introduce some American hop characteristics into the flavour and aroma. This will be achieved with a single late boil addition of Ahtanum, Simcoe, Columbus and Amarillo (5g each). This should give a light and subtle American hop flavour and aroma.
Standard Stout II
Author: Mark
Size: 25.2 L
Efficiency: 74.34%
Attenuation: 72.1%
Calories: 142.33 kcal per 12.0 fl oz
Original Gravity: 1.043 (1.044 - 1.060)
Terminal Gravity: 1.012 (1.012 - 1.024)
Color: 62.15 (59.1 - 78.8)
Alcohol: 4.03% (4.0% - 6.0%)
Bitterness: 20.9 (20.0 - 40.0)
Ingredients:
3000 g Maris Otter
500 g Barley Flaked
500 g Carapils®/Carafoam®
432 g Roasted Barley
260.0 g Chocolate 1060 EBC
38.0 g Goldings (5.0%) - added during boil, boiled 60 min
5.0 g Ahtanum (6.0%) - added during boil, boiled 1.0 min
5.0 g Amarillo (8.5%) - added during boil, boiled 1.0 min
5.0 g Columbus (15.0%) - added during boil, boiled 1.0 min
5.0 g Simcoe (13.0%) - added during boil, boiled 1.0 min
1.0 tsp Irish Moss - added during boil, boiled 15 min
250 g DME
1.0 ea Fermentis US-05 Safale US-05
Mash @ 67c
Saturday, July 2, 2011
AG #9 - Furious IPA - Fermentation & Conditioning
The brew day for Furious IPA went very well and in this post I just wanted to give you an outline of my fermentation and conditioning schedule. Here is the timeline:

Brew day: 4th June
Primary Fermentation: 4th - 18th June
On the 18th I kegged one corny (19 litres) and 9 x 500 ml bottles.
Keg
Keg Conditioning (room temperature): 18th - 25th June
Keg Conditioning (fridge temperature): 25th - 30th June
Force Carbonation: 1st July - 8th July
Bottle
Bottles will condition for 2-3 months at room temperature and then get a week of cold conditioning before being ready. With a session beer, bottle conditioning can be done in 2-3 weeks, however with this beer being 6% ABV it will benefit from the extra time in the bottle*.
* to be honest so would the keg, but who is going to be able to leave a keg condition for a couple of months, especially when my keggerator is empty!
So a pretty straightforward fermentation and conditioning process. Keg is typically one week conditioning, one week cold conditioning and one week force carbonating. For bottles a minimum of two weeks conditioning and then the longer you can hold off the better the beer will taste, most bottled beers will probably be at their peak between two and four months old. The above can be used as a rule of thumb but obviously adjust based on your set-up and the beer you are brewing.
Really looking forward to trying this beer next weekend. I'll report back on how it turned out.
Saturday, June 18, 2011
AG #9 - Furious IPA - Brew Day
Over the June bank holiday weekend here in Ireland I got the opportunity to brew, the recipe is based on a clone recipe for Furious IPA (by Surly Brewing) that appeared in BYO. The thing I like about brew days is trying something new and on this particular brew day, an additional piece of equipment allowed me to try out two new techniques.
The new piece of equipment was a HLT (hot liquor tank), having a dedicated vessel for heating my strike and sparge water allowed me to brew using a three tier gravity fed system. Basically your three main brewing vessels (HLT, Mash Tun and Kettle) are set up so that you can move the liquid from one vessel to the next during the brewing process using only gravity. In the picture to the right you can see this in action. HLT can be seen with the foil insulation, blue cooler box mash tun in the middle and then my kettle at the bottom.
The great advantage of this set up is that it allows me to try out a new technique which was continuos sparging. This in essence means that once your mash has completed (in my case after 60 minutes), instead of draining off all of the wort and then filling the mash tun again with water (known as batch sparging), you can simply open the tap from the HLT to your mash tun and then the tap from your mash tun to your kettle. As the wort drains into the kettle, new water is replacing it in the mash tun. This technique is great as a time saver and also gives you a really good grain bed in the mash tun to filter your wort through. The one slight downside some people find with this technique is that mash efficiency can drop, mash efficiency calculates how efficient your process is at getting fermentable sugars from the grain into your wort. However I have to say that I did not find this to be the case, I achieved an efficiency of 73%, which is pretty similar to what I get when I batch sparge.
Due to the fact that I now could use my kettle purely for boiling wort (before I had a dedicated HLT it also doubled up to heat my strike and sparge water) I can also try out another new technique, first wort hopping. First wort hopping entails placing hops in the kettle and then starting the flow of wort from the mash tun into the kettle. It is another technique for getting hop flavour into your beers and it is said to give a nice balanced bitter flavour and not the harsh bitterness you sometimes get when too much bittering hops are used.
This beer is a bit of a hop monster, with over 100g of hops used for the 7 gallon batch it has IBU's in the region of about 70 and an ABV a touch over 6%. I transferred this to the keg today and had enough left over to fill about 10 bottles. The clarity of the beer was perfect, which was something I struggled with in my last beer, but I am glad to see that the few tweaks I made to my brewing process seem to have solved this issue. The taste was fantastic, very hoppy with a nice malt base. I am really looking forward to trying this beer, however I am going to be patient. A week conditioning at room temp in the keg will be followed by a week of cold conditioning, I will then force carbonate for a week. Will report back next month with some tasting notes.
 |
| Three Tier Gravity Fed Set Up |
The great advantage of this set up is that it allows me to try out a new technique which was continuos sparging. This in essence means that once your mash has completed (in my case after 60 minutes), instead of draining off all of the wort and then filling the mash tun again with water (known as batch sparging), you can simply open the tap from the HLT to your mash tun and then the tap from your mash tun to your kettle. As the wort drains into the kettle, new water is replacing it in the mash tun. This technique is great as a time saver and also gives you a really good grain bed in the mash tun to filter your wort through. The one slight downside some people find with this technique is that mash efficiency can drop, mash efficiency calculates how efficient your process is at getting fermentable sugars from the grain into your wort. However I have to say that I did not find this to be the case, I achieved an efficiency of 73%, which is pretty similar to what I get when I batch sparge.
 |
| First Wort Hopping |
This beer is a bit of a hop monster, with over 100g of hops used for the 7 gallon batch it has IBU's in the region of about 70 and an ABV a touch over 6%. I transferred this to the keg today and had enough left over to fill about 10 bottles. The clarity of the beer was perfect, which was something I struggled with in my last beer, but I am glad to see that the few tweaks I made to my brewing process seem to have solved this issue. The taste was fantastic, very hoppy with a nice malt base. I am really looking forward to trying this beer, however I am going to be patient. A week conditioning at room temp in the keg will be followed by a week of cold conditioning, I will then force carbonate for a week. Will report back next month with some tasting notes.
Monday, June 6, 2011
Eight Degrees Brewing
I spoke today with Scott from Eight Degrees Brewing, the latest entrant into the Irish craft beer market. Based in North Cork, Eight Degrees is taking a slightly different trajectory than other Irish craft brewers. Their vision is to produce their beers in 330 ml bottles and look to sell them by the six-pack. This is something that would be very common in the American market but something that Irish brewers have not yet tried. Currently most Irish brewers sell their beer in 500ml bottles. Scott hopes that this packaging will differentiate them in the Irish market.

The beer they will be releasing initially will be Howling Gale Ale, and this looks set to be followed by a red ale and a porter. I tried the Howling Gale this afternoon and it was very good. Bittered strongly with Chinook at the start of the boil, it is then finished off with Amarillo and I think Centennial, all of this hoppiness is backed up by a nice sweet malt base. The beer will be bottle conditioned and Scott says that their bottling set up will allow up to 48 bottles a minute and so we should hopefully be seeing six packs of Howling Gale available in your local off-licence very soon. Better still is the price point, the six-packs will be sold for approximately €12, will special pricing reducing it to closer to €10 on occasion!
Howling Gale will also be available on draught and should be reaching pubs in the next week (Bull & Castle, Against the Grain and L Mulligan Grocer, all in Dublin, will be getting kegs shortly).
Saturday, May 28, 2011
AG #9 - Furious IPA - Recipe
Next weekend in Ireland is the June bank holiday weekend, with the weatherman assuring us of nice weather to come, it's definitely time for a brew day. This recipe is based on a clone recipe of Furious IPA by Surly Brewing, the recipe appeared in BYO magazine. I have tweaked it a little bit but essentially I am trying to re-create the Surly Brewing beer, a flavourful, hoppy, American IPA.Here's how Surly describe this beer:
A tempest on the tongue, or a moment of pure hop bliss? Brewed with a dazzling blend of American hops and Scottish malt, this crimson-hued ale delivers waves of citrus, pine and caramel-toffee. For those who favor flavor, Furious has the hop-fire your taste buds have been screeching for.
Sounds good....
Furious IPA
14-B American IPA
Author: Mark/Surly Brewing
Size: 23.04 L
Efficiency: 70.0%
Attenuation: 75.0%
Calories: 206.76 kcal per 12.0 fl oz
Original Gravity: 1.062 (1.056 - 1.075)
|=============#==================|
Terminal Gravity: 1.015 (1.010 - 1.018)
|==================#=============|
Color: 33.37 (11.82 - 29.55)
|===========================#====|
Alcohol: 6.11% (5.5% - 7.5%)
|============#===================|
Bitterness: 73.8 (40.0 - 70.0)
|==========================#=====|
Ingredients:
6000.0 g Maris Otter
336.0 g Belgian Aromatic
408.0 g Crystal Malt 60°L
68.0 g Roasted Barley
17.0 g Ahtanum (6.0%) - added first wort, boiled 60 min
34.0 g Columbus (15.0%) - added during boil, boiled 60 min
10.0 g Columbus (15.0%) - added during boil, boiled 2.0 min
8.0 g Amarillo (8.5%) - added during boil, boiled 2.0 min
8.0 g Simcoe (13.0%) - added during boil, boiled 2.0 min
8.0 g Ahtanum (6.0%) - added during boil, boiled 2.0 min
8.0 g Amarillo (8.5%) - added during boil, boiled 0 min
8.0 g Simcoe (13.0%) - added during boil, boiled 0 min
8.0 g Columbus (15.0%) - added during boil, boiled 0 min
1.0 tsp Irish Moss - added during boil, boiled 15.0 min
1.0 ea WYeast 1335 British Ale II
Sunday, May 15, 2011
Yeast - Dry or Liquid?
When it comes to making beer, it has been said a million times before, but is worth reiterating; yeast makes beer, not brewers. The importance of this statement is not just to explain the part that yeast plays in turning your sweet wort into alcoholic beer, but rather to emphasize the fact that if you want to make good, or even great beer, then yeast should be one of your focus areas. There are lots of yeast strains to choose from but one of the first decisions to be made is whether to use dry or liquid yeast.
Dry Yeast
 Dry yeast is probably where most homebrewers will start. If you begin with kit brewing you would normally get a sachet of dried yeast included with your kit. Once you move onto extract or all-grain brewing you then have the option to continue using dried yeast.
Varieties: There are a limited number of yeast strains available in dry form and that is due to the fact that not all yeast strains can be freeze dried successfully. Popular dry yeasts include US05, US04 and Nottingham.
How to Use it: The optimal way to use dried yeast is to rehydrate it prior to pitching. To do this simply get a plastic bottle and fill with 100ml of boiled water and let it cool to 20-25c. Then pour the sachet of yeast into the bottle, but do not shake. Cover the top with some foil and then let it sit for 10-15 minutes, then you can gently swirl the bottle and allow to sit for another 10-15 minutes. Once you wort has cooled to roughly 20c you can then pour in the contents of the bottle and stir it in.
Pro's: There are a number of advantages of dry yeast. It is relatively cheap compared to other forms of yeast and it is also very easy to use.
Con's: The main downside of dried yeast is the limited variety of yeast strains. Also as with any food stuff that has been dried it certainly loses some of the flavours and freshness that you would get with a liquid yeast.
Summary: An easy to use dependable form of yeast that is particularly good for beginner homebrewers who wants to focus more of their attention on other elements of the brewing process.
Liquid Yeast:
Liquid yeast is the choice for more advanced homebrewers. Due to the wide choice of yeast strains it allows you to brew a beer with the specific strain that is traditionally used.
Varieties: Yeast strains available in liquid form number in the hundreds and style specific strains allow for a much more authentic brew to be made.
How to Use it: Liquid yeast normally comes in two distinct forms. Either pitchable yeast which can be used straight from the vial or alternatively the yeast may require a starter wort to be made. The simple instructions on creating a starter wort are detailed on the packaging, and although time consuming is very straight forward.
Pro's: The advantages of liquid yeast really lie in two main areas, firstly the variety of strains allows for much greater choice. Secondly, once prepared correctly, it can offer a much healthier yeast as it is much fresher. Another option is to reuse the yeast slurry from a batch of beer and so it can be used through a number of batches.
 |
| Pitchable yeast allows you to pitch directly into a 5 gallon batch. |
Con's: The disadvantages of liquid yeast are that it is more expensive that the dried version and also if you use a form that requires a starter wort to be made this can be quite time consuming.
Summary: When choosing which type of yeast to be used I would recommend that beginners use dried yeast. This is due to the fact that when beginning to brew there is quite a lot of processes to get your head around and the added complication of having to prepare a yeast starter is probably something the beginner can do without. For more advanced brewers I would suggest it is a matter of 'horses for courses'. If you are brewing a simple sessionable pale ale you can do no wrong going with the dry yeast strain US05. However if you are brewing a beer that requires more of an input from the yeast to create its flavour and profile I would certainly look at liquid yeast options.
Further Reading:
Homebrewtalk.com Wiki - Yeast
How to Brew, John Palmer - Chapter 6: Yeast (online edition)
Further Reading:
Homebrewtalk.com Wiki - Yeast
How to Brew, John Palmer - Chapter 6: Yeast (online edition)
Monday, May 9, 2011
Troubleshooting - Homebrew Haze
I have been drinking the results of my most recent homebrew, Lady Liberty Ale, and while the taste profile was exactly what I was looking for, a light sessionable pale ale, the one problem with the beer is that it is quite hazy. While this is an aesthetic thing it is quite annoying and so I set about investigating the different causes of haze to see if I could make sure that I could address any problem in my process that could have led to this. Haze in beer can be one of two types, it can be permanent or temporary.
Permanent haze in beer is typically caused by two different kinds of process, biological or non-biological. Biological basically means that your beer has been infected. In this instance I do not think that the beer in infected, it has no off-flavours or smells and so I believe that the issue that caused the haze in this case is non-biological. If it was a biological infection the most likely cause would be poor sanitation, as sanitation is something I am very fastidious with when brewing I do not think this is the issue. Permanent non-biological haze is more than likely caused by an excess of starch built up due to an issue in the brewing process. This is a rare occurrence and so the focus of my investigation will be in relation to possible temporary haze, temporary haze can be caused by a number of issues.
Chill haze in beer is caused by proteins bonding with polyphenols and becoming insoluble, this occurs when the beer is cold and so as the beer warms they should dissolve once again. Chill haze in beer needs to be fixed through a process change, it is important to get your wort boiling quickly at the start of your boil to enable a good hot break, similarly it is important to chill your wort quickly post-boil in order to get a good cold break. Achieving these two breaks quickly should reduce the risk of chill haze in your beers. Another thing that will help solve this issue is to use a fining agent, Irish Moss or Whirlfloc can be added to the kettle 10-15 minutes from the end of the boil (personally I use Irish Moss).
The second possible cause of temporary haze could be from the presence of residual yeast in the beer, this is caused when yeast calls do not settle to the bottom of the fermentation vessel once fermentation is complete. You can solve this issue through a little patience, the typical conditioning period of 2 weeks can be extended and more time conditioning should encourage the yeast to settle out. If you are really concerned you can use another fining agent called Isinglass which can be added to the beer after fermentation.
Conclusion:
In my case I believe the haziness is due to two problems; chill haze and residual yeast. To test whether this was purely chill haze I poured a glass from the keg and left it for a few hours to warm up, although there was some improvement in clarity the beer still appeared hazy. Secondly I read back through my notes and noted some issues with the yeast, 1) it was right at the outer edge of its use by date and 2) it did not completely ferment out as I would have expected it to and finished a couple of gravity points too high.
In order to address these issues I will make two changes to my brewing process for future batches. To address the chill haze problem I will make sure to have a good rolling boil throughout the 60 minute boil (at times in the past I have had the tendency to switch off one of my elements and just maintain a weak boil). Secondly to address the issue of residual yeast I have decided to invest in a wort aeration system that will allow my to oxygenate the cooled wort prior to pitching the yeast. This should create a very healthy environment for the yeast to do its work in.
Further Reading/Reference:
Brew Your Own Magazine, Hazy Homebrew by Betsy Parks, May-June 2011, p. 11
The Home Brewers Answer Book, Ashton Lewis, p. 312-314
How To Brew, John Palmer, Appendix C - Beer Clarity, p. 277-281
 |
| Lady Liberty Ale; tasty, but hazy. |
Chill haze in beer is caused by proteins bonding with polyphenols and becoming insoluble, this occurs when the beer is cold and so as the beer warms they should dissolve once again. Chill haze in beer needs to be fixed through a process change, it is important to get your wort boiling quickly at the start of your boil to enable a good hot break, similarly it is important to chill your wort quickly post-boil in order to get a good cold break. Achieving these two breaks quickly should reduce the risk of chill haze in your beers. Another thing that will help solve this issue is to use a fining agent, Irish Moss or Whirlfloc can be added to the kettle 10-15 minutes from the end of the boil (personally I use Irish Moss).
 |
| Brewers don't make beer, yeast does and healthy yeast = tasty beer. |
Conclusion:
In my case I believe the haziness is due to two problems; chill haze and residual yeast. To test whether this was purely chill haze I poured a glass from the keg and left it for a few hours to warm up, although there was some improvement in clarity the beer still appeared hazy. Secondly I read back through my notes and noted some issues with the yeast, 1) it was right at the outer edge of its use by date and 2) it did not completely ferment out as I would have expected it to and finished a couple of gravity points too high.
In order to address these issues I will make two changes to my brewing process for future batches. To address the chill haze problem I will make sure to have a good rolling boil throughout the 60 minute boil (at times in the past I have had the tendency to switch off one of my elements and just maintain a weak boil). Secondly to address the issue of residual yeast I have decided to invest in a wort aeration system that will allow my to oxygenate the cooled wort prior to pitching the yeast. This should create a very healthy environment for the yeast to do its work in.
Further Reading/Reference:
Brew Your Own Magazine, Hazy Homebrew by Betsy Parks, May-June 2011, p. 11
The Home Brewers Answer Book, Ashton Lewis, p. 312-314
How To Brew, John Palmer, Appendix C - Beer Clarity, p. 277-281
Tuesday, May 3, 2011
Brewing Equipment - Stainless Steel
Stainless Steel (SS) brewing equipment is the dream of all homebrewers, it's shiny, it looks cool and it looks semi-professional, all things that appeal to us brewing geeks. However the major draw back is the cost! All of my all-grain equipment (fermenters, kettle, mash tun) was sourced or made with a total outlay of about €200 (approx. $300). Here is a quick comparison of the costs:
My kettle is a converted 33 ltr plastic fermentor that has been fitted with two kettle elements, a hop strainer and a tap, this was a DIY project and cost me about €60. An 8g SS kettle with tap, thermometer and false bottom will cost a minimum of €150, the really good ones (like boilermaker) could cost three times this amount.
My mash tun is a converted 28 ltr cool box, I bought this already converted at a cost of about €85. An SS mash tun with tap, thermometer and false bottom starts at about €250.
My fermenters are all plastic, I have both bucket and carboy types, each costing €10-15 each. An SS conical fermenter will cost you in the region of €700-800!
Living in Ireland adds another layer of cost as these products are not available in Ireland and so you will also be paying to ship them from the US or UK.
The reason for my post on this topic is that I have been considering switching some of my equipment to SS. Initially I think I will look to replace my kettle, I have found a US eBay shop that has 8g SS kettles with thermometer and tap for about €180 (including postage). I will then use my current kettle as a hot liqueur tank (HLT). The next step after this will then be to replace my Mash Tun with SS and then finally (probably in the very distant future) I will look at investing in a SS conical fermenter. All of this is further complicated by the fact that the switch to SS in my boiler will mean that I will also need to invest in a gas burner and some form of stand, as my current set up is all electric.
Whoever said that home brewing was cheap? It may be cheap to get into, but once it has it's talon like claws in you it will drag you down the route of wanting the cool equipment, however it will probably pay for itself in 20-30 brews :-)
For your viewing pleasure here are some links to some shiny brewing equipment:
BoilerMaker Brew Kettles
Hop & Grape SS Mash Tun
Blichmann Conical Fermenters
 |
| BoilerMaker Brew Kettles, the Rolls Royce of home brewing. |
My mash tun is a converted 28 ltr cool box, I bought this already converted at a cost of about €85. An SS mash tun with tap, thermometer and false bottom starts at about €250.
My fermenters are all plastic, I have both bucket and carboy types, each costing €10-15 each. An SS conical fermenter will cost you in the region of €700-800!
 |
| My DIY Kettle. |
The reason for my post on this topic is that I have been considering switching some of my equipment to SS. Initially I think I will look to replace my kettle, I have found a US eBay shop that has 8g SS kettles with thermometer and tap for about €180 (including postage). I will then use my current kettle as a hot liqueur tank (HLT). The next step after this will then be to replace my Mash Tun with SS and then finally (probably in the very distant future) I will look at investing in a SS conical fermenter. All of this is further complicated by the fact that the switch to SS in my boiler will mean that I will also need to invest in a gas burner and some form of stand, as my current set up is all electric.
Whoever said that home brewing was cheap? It may be cheap to get into, but once it has it's talon like claws in you it will drag you down the route of wanting the cool equipment, however it will probably pay for itself in 20-30 brews :-)
For your viewing pleasure here are some links to some shiny brewing equipment:
BoilerMaker Brew Kettles
Hop & Grape SS Mash Tun
Blichmann Conical Fermenters
Wednesday, April 27, 2011
Force Carbonation
When you first start kegging your beer the one thing you need to decide is what method you are going to use to force carbonate your beer. Below I have set out the steps for force carbonating your beer using two different techniques. The first few steps are the same regardless of the method you are going to follow, then the techniques diverge, I will lay out the steps to follow for each technique and then I will give the reasons I follow one of the techniques.
Step 1 - Transfer your beer to the keg, connect the Co2, turn on, and purge the keg with a few lifts of the pressure release valve. Doing this will help seal the lid properly and also expel any oxygen present in the deadspace at the top of your keg.
Step 2 - Turn off the gas and let your keg refrigerate for 24-48 hours. This will allow the temperature of the beer to drop which will result in easier absorption of the Co2 once you start to force carbonate.
Method 1: Rock and Roll
Step 3 - Turn the gas on and raise to a PSI of about 45, you will now hear the Co2 entering the keg, now gently place the keg across your knee making sure the 'gas in' post is at the top of the keg*. Now gently rock the keg back and forth across your knee for about one minute. As you do this you will hear the Co2 entering the keg constantly. It is now being absorbed into the liquid and the tank is refilling the dead space with more Co2.
Step 4 - After a minute turn off the gas at the regulator and continue to rock the keg back and forth. The gauge on your regulator should now start to drop. You are looking for it to stop at between 20-23 PSI, if it falls below this it is under gassed and you may need to repeat steps 3 and 4. If it finishes above this the beer may be over gassed and so you will need to vent the excess gas.
Step 5 - Leave the keg to sit for one hour and then turn the gas back on to 15 PSI. Your beer should now be carbonated to the right level.
*this is done to try and alleviate the risk of liquid entering the gas line, if liquid gets sucked up the gas line to your regulator it will ruin it.
Method 2: Set and Leave
Step 3 - Turn the regulator to the desired PSI based on the table below. In order to determine the liquid temperature of your beer, place a spirit thermometer in a glass of water in your kegerator while the beer is left to cool for 24-48 hours, this should give you an accurate enough reading for the liquid temperature inside your kegerator.
Temperature is listed down the left hand side and PSI across the top, so for example if the liquid temperature is 8c and you are looking for a carbonation level of 2.1**, then you need to set your regulator to 11.
Step 4 - Be patient, following this method your beer should be carbonated to the desired level in 4 days, however if you can leave it for a week then all the better.
** The level of carbonation you aim for really depends on the style of beer you are brewing and also your personal preferences, here is a rough guide of what you should be aiming for with the most typical styles:
British Style Ales: 1.5 - 2
Stouts/Porters: 1.7-2.3
American Ales/Lagers: 2.2 - 2.7
German Wheat Beers: 3.3 - 4.5
My Technique
Personally I use the set and leave method. I find this to be very consistent, and extremely straight forward. You determine the PSI based on the table above, set your regulator and then leave it alone. Moreover when you come to serving your beer you can leave the regulator as is and leave your gas turned on all the time (although do make sure you have no leaks). Due to the fact that equilibrium will have been achieved between the keg and Co2 tank the only gas that will be used is as you dispense the beer and so it is an easy, no hassle way of carbonating and dispensing your beer.
 |
| My set up, a 6kg Co2 tank sits outside the fridge and a gas line is fitted through a hole drilled in the kegerator door. |
Step 2 - Turn off the gas and let your keg refrigerate for 24-48 hours. This will allow the temperature of the beer to drop which will result in easier absorption of the Co2 once you start to force carbonate.
Method 1: Rock and Roll
Step 3 - Turn the gas on and raise to a PSI of about 45, you will now hear the Co2 entering the keg, now gently place the keg across your knee making sure the 'gas in' post is at the top of the keg*. Now gently rock the keg back and forth across your knee for about one minute. As you do this you will hear the Co2 entering the keg constantly. It is now being absorbed into the liquid and the tank is refilling the dead space with more Co2.
Step 4 - After a minute turn off the gas at the regulator and continue to rock the keg back and forth. The gauge on your regulator should now start to drop. You are looking for it to stop at between 20-23 PSI, if it falls below this it is under gassed and you may need to repeat steps 3 and 4. If it finishes above this the beer may be over gassed and so you will need to vent the excess gas.
Step 5 - Leave the keg to sit for one hour and then turn the gas back on to 15 PSI. Your beer should now be carbonated to the right level.
*this is done to try and alleviate the risk of liquid entering the gas line, if liquid gets sucked up the gas line to your regulator it will ruin it.
Method 2: Set and Leave
Step 3 - Turn the regulator to the desired PSI based on the table below. In order to determine the liquid temperature of your beer, place a spirit thermometer in a glass of water in your kegerator while the beer is left to cool for 24-48 hours, this should give you an accurate enough reading for the liquid temperature inside your kegerator.
| PSI | |||||||||
| Temp | 9 | 10 | 11 | 12 | 13 | 14 | 15 | 16 | 17 |
| 7 | 2 | 2.1 | 2.2 | 2.3 | 2.4 | 2.5 | 2.6 | 2.7 | 2.8 |
| 8 | 1.9 | 2 | 2.1 | 2.2 | 2.3 | 2.4 | 2.5 | 2.6 | 2.7 |
| 9 | 1.85 | 1.9 | 2 | 2.1 | 2.2 | 2.3 | 2.4 | 2.5 | 2.6 |
| 10 | 1.8 | 1.8 | 1.9 | 2 | 2.1 | 2.2 | 2.3 | 2.4 | 2.5 |
Temperature is listed down the left hand side and PSI across the top, so for example if the liquid temperature is 8c and you are looking for a carbonation level of 2.1**, then you need to set your regulator to 11.
Step 4 - Be patient, following this method your beer should be carbonated to the desired level in 4 days, however if you can leave it for a week then all the better.
** The level of carbonation you aim for really depends on the style of beer you are brewing and also your personal preferences, here is a rough guide of what you should be aiming for with the most typical styles:
 |
| My current APA carbonating at a PSI of 10. |
Stouts/Porters: 1.7-2.3
American Ales/Lagers: 2.2 - 2.7
German Wheat Beers: 3.3 - 4.5
My Technique
Personally I use the set and leave method. I find this to be very consistent, and extremely straight forward. You determine the PSI based on the table above, set your regulator and then leave it alone. Moreover when you come to serving your beer you can leave the regulator as is and leave your gas turned on all the time (although do make sure you have no leaks). Due to the fact that equilibrium will have been achieved between the keg and Co2 tank the only gas that will be used is as you dispense the beer and so it is an easy, no hassle way of carbonating and dispensing your beer.
Wednesday, April 20, 2011
Metalman Pale Ale
I posted a few months ago with regard to the imminent launch of Metalman Brewing's first beer, a pale ale. I know the co-founders through Beoir and so I was really excited to sample their first professional brew (although I had tasted a number of their pilot home brew batches). Through one thing and another I never made it to their launch night and so it was only last Saturday in L Mulligan Grocers in Dublin that I got the opportunity to try Metalman Pale Ale for the first time.
I have to say that I really enjoyed this beer. It is great to see an Irish brewery brewing American style beers and doing it so well. Metalman Pale Ale has lovely citrus and floral notes in the aroma, this is followed by a nice body and finishes with a nice stiff level of bitterness. It is very refreshing and I can see it making a great summer session beer.
The great news is that Metalman are set to launch their second beer this weekend, a seasonal special, Windjammer. I have not tried this beer yet and so i'll give you the description from Metalman themselves:

American style amber, but hopped exclusively with New Zealand hops. An antipodean extravaganza, with Southern Cross and Pacifica for bittering and flavouring, with Nelson Sauvin included in the late additions.
Sounds great and I have been told that Windjammer should be available in the Bull & Castle in Dublin from next week.
I have to say I really like the direction that Metalman is taking, I think they have hit the mark in relation to their branding and their product range to date and hopefully in the not too distant future we may see Metalman bottling some of their range. You can find out where you can try Metalman beers through the 'Find a Stockist' section of their website.
I have to say that I really enjoyed this beer. It is great to see an Irish brewery brewing American style beers and doing it so well. Metalman Pale Ale has lovely citrus and floral notes in the aroma, this is followed by a nice body and finishes with a nice stiff level of bitterness. It is very refreshing and I can see it making a great summer session beer.
The great news is that Metalman are set to launch their second beer this weekend, a seasonal special, Windjammer. I have not tried this beer yet and so i'll give you the description from Metalman themselves:
American style amber, but hopped exclusively with New Zealand hops. An antipodean extravaganza, with Southern Cross and Pacifica for bittering and flavouring, with Nelson Sauvin included in the late additions.
Sounds great and I have been told that Windjammer should be available in the Bull & Castle in Dublin from next week.
I have to say I really like the direction that Metalman is taking, I think they have hit the mark in relation to their branding and their product range to date and hopefully in the not too distant future we may see Metalman bottling some of their range. You can find out where you can try Metalman beers through the 'Find a Stockist' section of their website.
Monday, April 11, 2011
To Dry Hop or Not
Dry hopping in brewing is the technique of introducing hops to the beer later in the process than is usual. Typically hops are introduced to the beer during the boil, during the boil early hops impart bitterness, those added in the middle to late boil impart flavour and hops added late or at flame-out impart aroma. The aroma and flavour of hops can be quite delicate and dry hopping is used to boost the hop flavour and aroma of a beer. Typically dry hopping can occur in two ways. The most usual way is to dry hop the beer in secondary after the vigorous primary fermentation has completed, the second way is to dry hop beer while it is in its serving keg. The latter is something that I have done with some success in the past by adding a bag of hops to a keg and leaving the hops in the keg during dispensing.
With my latest beer I wanted to do a comparison between a beer that was dry hopped and one that was not. So yesterday I bottled eight beers from my Lady Liberty Pale Ale (straight from Primary) and then transferred the remaining 19 litres to a carboy and dry hopped this with 25g of cascade hops. The carboy will be left for a week before being transferred to a keg and carbonated. I then should be able to do a taste test between the bottled beer and the dry hopped keg beer.
I will report back with my findings in 2-3 weeks.
Tuesday, March 29, 2011
Where does the future of craft beer lie?
The recent announcement that Goose Island was to be bought by AB InBev has got me thinking about the future of craft beer and what the future may hold for the fledgling Irish craft beer scene.
 I am a big fan of Goose Island's IPA as well as their Honkers Ale and so I greeted this news with mixed feelings. On the one hand I lamented the fact that a great craft brewery had succumbed to the corporate greed of the brewing behemoth, however in retrospect I think that this augers well for Goose Island. For me personally it should certainly mean greater access to their beers as they make use of the global distribution network of AB InBev. Also if reports are to be believed, it appears that Goose Island will still operate as is, with very little input from AB InBev in relation to brewing operations, marketing and product development. This should allow the brewery to grow and prosper, opening up their quality product to a wider market. From an AB InBev point of view it would seem that this deal has lots of positives. They are buying a proven and quality brand. They are tapping into a market, that while currently small, is growing year on year. Lastly they are expanding their product range, so that when you or I walk into a bar or off-licence, they will probably have a product that meets our needs regardless of our taste in beer.
But how will all of this play out in our little craft brewing backwater of Ireland. I think this deal will have one major long term effect, and that will be to open up the market for Irish craft brewers to prosper. If AB InBev put a small fraction of the capital they put into promoting their mainstream brands into promoting Goose Island then it is safe to say that in the medium to long term we will all be drinking more Goose Island. We taste Goose Island, we like it, our interest expands, we try other beers we may not have heard of etc etc etc.
I cannot envisage a day when Trouble Brewing, Metalman, Dungarvan Brewing or any of our other indigenous craft breweries would catch the eye of a Diageo or AB Inbev, but you never know what the next 10 or 20 years will hold for these fledgling enterprises. Hopefully as they begin their journey it will help their product reach a wider market and lead to more choice for beer lovers.
Tuesday, March 22, 2011
AG #8 - Lady Liberty Ale - Fermentation update
Ordinarily when I brew a beer I will leave it happily fermenting away for at least a week before I concern myself with how things are progressing. On this occasion two things have led me to take a look earlier than normal. Firstly the yeast I used was a liquid yeast and normally it is not advised to use a liquid yeast if it is more than 6 months from its manufacture date. My yeast was seven months from its date of manufacture, due to this I was expecting to have to either pitch a packet of dry yeast on top of the liquid yeast, or be very patient and wait for fermentation to build very slowly.
The second reason I was interested in finding out where things were at with this beer was that, considering point one above, I was surprised to watch fermentation take off like a rocket. Within six hours of pitching the yeast I had airlock activity and by 18 hours the airlock was bubbling a couple of times a second, which is probably the most aggressive fermentation I have seen for a while.
The result of this, after 4 days fermentation, 1016. Target for this beer is 1012 and I would expect it to achieve that over the next week or so. The plan is to leave this beer in primary for another 7-10 days, I will then transfer to secondary and dry hop with some cascade.
Oh, it tastes pretty good as well.
Monday, March 14, 2011
AG #8 - Lady Liberty Ale - Recipe
For one reason or another it has been a long time since I had a brewday (kids, new job, weather etc, etc). But finally I have a day set aside this week to get back in the brewing way. I really enjoyed my last brew but found that it was a little too strong to have as a session beer and so I decided that this time around I would revisit one of my favourite sessionable styles, American pale ale. I have not yet made a brew using amber malt and so I decided to brew this beer, which is a recipe from Palmers How To Brew. Apart from the amber malt this is not a great departure from my previous pale ales, and once again relies heavily on two of my favourite hops, Amarillo and Cascade.
The only thing that will stop me from brewing this week will be torrential rain or an unseasonal snow shower, here's hoping we don't get either!
Lady Liberty Ale
10-A American Pale Ale
Author: Mark (from John Palmer's, How to Brew)

Lady Liberty Ale
10-A American Pale Ale
Author: Mark
Size: 25.04 L
Efficiency: 72.93%
Attenuation: 75.0%
Calories: 159.41 kcal per 12.0 fl oz
Original Gravity: 1.048 (1.045 - 1.060)
Terminal Gravity: 1.012 (1.010 - 1.015)
Color: 23.63 (9.85 - 27.58)
Alcohol: 4.71% (4.5% - 6.2%)
Bitterness: 41.0 (30.0 - 45.0)
Ingredients:
4565.0 g Maris Otter
300.0 g Amber Malt
310.0 g Crystal 60
21.0 g Northern Brewer (10.5%) - added during boil, boiled 60 min
20.0 g Cascade (5.5%) - added during boil, boiled 30 min
21.0 g Cascade (5.5%) - added during boil, boiled 15 min
16.0 g Amarillo (9.5%) - added during boil, boiled 1.0 min
1.0 tsp Irish Moss - added during boil, boiled 15.0 min
22.0 g Cascade (5.5%) - added dry to secondary fermenter
1.0 ea WYeast 1056 American Ale
200.0 g Dry Light Extract
The only thing that will stop me from brewing this week will be torrential rain or an unseasonal snow shower, here's hoping we don't get either!
Lady Liberty Ale
10-A American Pale Ale
Author: Mark (from John Palmer's, How to Brew)
Lady Liberty Ale
10-A American Pale Ale
Author: Mark
Size: 25.04 L
Efficiency: 72.93%
Attenuation: 75.0%
Calories: 159.41 kcal per 12.0 fl oz
Original Gravity: 1.048 (1.045 - 1.060)
Terminal Gravity: 1.012 (1.010 - 1.015)
Color: 23.63 (9.85 - 27.58)
Alcohol: 4.71% (4.5% - 6.2%)
Bitterness: 41.0 (30.0 - 45.0)
Ingredients:
4565.0 g Maris Otter
300.0 g Amber Malt
310.0 g Crystal 60
21.0 g Northern Brewer (10.5%) - added during boil, boiled 60 min
20.0 g Cascade (5.5%) - added during boil, boiled 30 min
21.0 g Cascade (5.5%) - added during boil, boiled 15 min
16.0 g Amarillo (9.5%) - added during boil, boiled 1.0 min
1.0 tsp Irish Moss - added during boil, boiled 15.0 min
22.0 g Cascade (5.5%) - added dry to secondary fermenter
1.0 ea WYeast 1056 American Ale
200.0 g Dry Light Extract
Tuesday, March 8, 2011
Maximator!

The beer pours a nice rust colour with a thick billowy loose head. The aroma is beautiful, it is sweet with nice caramel hints, little hop aroma is present. The beer is surprisingly under carbonated which is unusual for a German beer, the mouthfeel is relatively smooth and creamy. As this beer warms up you really get lovely complexity in the flavour. The caramel is still very much to the fore, but you also get traces of dried fruits and a slight burnt toffee flavour. It is quite boozy on the end and the finish is sticky and sweet with that lingering alcohol warmth.
Overall this is a very nice beer, strong, and due to the 500ml bottle is one to savour slowly. Definitely worth picking up a few bottles.
Tuesday, March 1, 2011
Trouble Brewing - Dark Arts
 Trouble Brewing launched in Ireland last year with their first offering, Oir, they have now doubled their product line by brewing a Porter, Dark Arts.
A very quick review from a recent pint I had in the Bull & Castle in Dublin. Chocolate sweet aroma. Thin but consistent tan head. Medium to full bodied with a very smooth and clean mouthfeel. Not a big hop presence, this beer is really all about the malt bill, which a porter should be. Needs to warm up a bit for you to get the full effect. I can see this being a really good session beer, a bit too easy to drink!
Tuesday, February 22, 2011
Exciting Times Ahead
The growth of the the craft brewing scene in Ireland has gained great momentum over the last few years. The launch of Trouble Brewing last year, and the recent launch of their second beer, Dark Arts, has shown that like minded people with a passion about good beer can overcome the bureaucracy inherent in the Irish system to launch a brewery to better serve a growing craft beer consuming demographic in Ireland.
Next week this momentum will be maintained by the official launch of Metalman Brewing. Metalman Brewing is the culmination of many years of experimentation and hard work by Grainne and Tim, two fellow members of Beoir who have achieved what we home brewers all dream of, making the leap to commercial brewing. Metalman's first brew will be a pale ale that they will officially launch in the Bull & Castle in Dublin next week. I for one am looking forward to trying their first commercial brew, having had the pleasure of sampling many of the home brew versions of their pale ale, based on my experience of these, I have no doubt that Metalman Pale Ale will be a great success.
I look forward to reviewing Metalman Brewing Beers for a long time to come and will report back shortly on the first offering to hit the market.
Tuesday, February 8, 2011
Isolation Ale
Still slowly but surely making my way through my Christmas hamper of beer. Next on the list is a seasonal offering from Odell Brewing, Isolation Ale.
 Described as a traditional winter ale, Isolation Ale pours a light Amber colour with a thin off white creamy head. Nice combination of malt and hops on the nose. The malt is to the fore with a nice hint of spicy and fruity hops. On the light side of medium bodied with a creamy mouthfeel. The taste is more hop forward than I would have expected from a winter beer, the hops are a nice balance of spicy and piney, with the merest hint of citrus. The finish has a very subtle bitterness.
Not what I would consider a traditional winter ale, for that I would have expected a very malty beer with a spicy hop profile, the malts in this beer are quite understated with the hops taking the driving seat. However as the beer warms up you get the malts more and more. Hints of chocolate and caramel raise their head and give this beer an altogether more wintry profile. Altogether this is a very nice beer and at 6.1% and not too heavy, I could see myself having a few of these. Definitely worth picking up a bottle or two.

Not what I would consider a traditional winter ale, for that I would have expected a very malty beer with a spicy hop profile, the malts in this beer are quite understated with the hops taking the driving seat. However as the beer warms up you get the malts more and more. Hints of chocolate and caramel raise their head and give this beer an altogether more wintry profile. Altogether this is a very nice beer and at 6.1% and not too heavy, I could see myself having a few of these. Definitely worth picking up a bottle or two.
Wednesday, February 2, 2011
Reason for Existence
Dogfish Head do some unusual beers. Their Raison D'être is a case in point, first brewed in 1998, it is not your usual American brown ale. First of all it is strong at 8%, secondly it uses some unusual ingredients including beet sugar and green raisons.
 Pours a lovely deep red colour with a thin off white head. The aroma is spicy with an underlying sweetness, the green raisons are very apparent on the nose. Medium to heavy bodied with a nice light level of carbonation. The mouthfeel is slightly cloying, coating your mouth and throat.
The taste is quite far away from what I would consider a brown ale to be, it tastes more like a strong Amber ale. The flavour is very malty with plenty of caramel and toffee in the middle, put I have to say the start and end of this beer, normally where the hops do their thing, is pretty disappointing. Being a hop focussed beer guy, my disappointment is a little unfair on this beer. This beer is tasty with a lovely depth of flavour in the malt profile and this is really what this beer is all about.
If you enjoy malt heavy ales, then you should certainly pick up a bottle of this, let it warm up and enjoy it's subtleties, just don't be expecting the usual Dogfish hop hit.
Subscribe to:
Posts (Atom)